Rolling out assistive technology in a school environment
This week we have a guest blog post from Randy Lyseng, an assistant principal and Certified Google Education Trainer responsible for a wide variety of technology PD and tools.
As a seasoned educator with over 25 years public school experience as a teacher, university facilitator, and educational technology consultant for a district of approximately 5,000 teachers, we turned to Randy to get his expertise on rolling out assistive technology school-wide.
If you are planning on using assistive technology or other education technology across your school or district this school year, you won't want to miss Randy's best practices.
Assistive Technology for Learning (ATL) often gets a raw deal. It usually gets singled out as something that only students with special needs require (see Wikipedia’s definition). However, what we’ve learned from Universal Design for Learning is that any student can benefit from an ATL tool - as they provide multiple means of representation, expression and engagement that all students can choose from to support their unique learning style.
Here are some time-effective strategies for successfully rolling out ATL in your school. For our example, let’s look at introducing Read&Write for Google ChromeTM.
Step 1: Start by Showing Students
Traditionally, we’ve used the “train the trainer” model to roll out technology in the school, where a lead teacher shows other teachers and learning eventually trickles down to the students. Why not flip it and get your students involved from the beginning? Ultimately, students are your key audience. After all, they will be the ones using this tool.
- Have teachers identify 3 - 4 students who are struggling writers - ELL students, those diagnosed with a writing challenge, or even those who are reluctant writers.
- Bring them to a public place in the school such as the Learning Commons (Library).
- Start off with a discussion - ask students to identify what frustrates them about writing. For some it might be idea generation. For others it might be spelling or vocabulary.
- Show them some key features of the Read&Write for Google Chrome toolbar - walk through Word Prediction, Read Aloud (play / pause / stop button) and the Settings (speed, language, voices).
- Before having the students test out the tool for themselves, ensure that they’ve properly installed Read&Write from the Chrome Webstore. Check with your district Google administrator to see which features students have access to.
- Have some Chromebooks and headphones available for the students to use. Have them log in, create a Google Doc and try out some of the basic tools by having them do a writing exercise.
- If needed, give the students a choice in selecting a writing prompt. A number of random idea generators can be found online.
- Give them 15 or 20 minutes to try out different tools. You will notice that each student will lean towards different features. You may even notice students showing each other how to use specific tools.
Step 2: Show and Share with Staff
- While the students are writing, you way want to invite staff members to watch and learn how students are using the tool. Have students explain what they’re doing and how they’re using Read&Write to help them with their writing. This training model, where older employees are being mentored by younger ones, is called Reverse Mentoring and has become a popular trend in industry and education.
- Ideally, the best time to roll out a tool to staff is immediately before a staff meeting. Ask students to stay (they may need gentle negotiating and time to make arrangements) and have them share their work while staff come into the meeting area.
- Invite all staff to do a gallery walk around and talk with the students.
- Watch the magic happen - you’ll notice that staff ask lots of questions, while others will look on in amazement.
- Debrief with staff afterwards and discuss how Read&Write could be of benefit to struggling writers. Staff often recognize benefits to all learners, and not just a select few.
- For those staff wanting to learn more, show them where to find the YouTube playlist from Texthelp.
- Consider creating a cohort that meets on a regular basis throughout the year to revisit and explore ideas. Ask interested staff to identify themselves as lead learners.
Step 3: Identify Staff Champions
- Identify key staff who are passionate and want to learn more about Read&Write. Don’t just limit this to teachers - include your support and custodial staff too!
- If some of your key people are teachers, offer to come into their classroom and do a demonstration for their students. You can even bring along the student experts you had for the staff meeting. It’s a great way to empower them!
- Once you’ve done a class demonstration, provide internal coverage so that this teacher and some students can show other classes within their grade or division.
Step 4: Involve your Parent Community
A couple of years ago, when we rolled out Read&Write for Google Chrome Premium Edition to our entire school district, our school organized a special parent evening. We invited students to bring their parents and showcase their writing. We advertised the event in our school communications, including Twitter and our school website.
In Conclusion
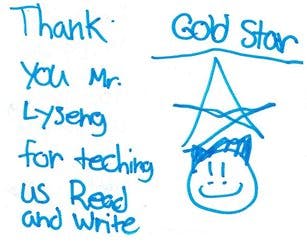
If you’re a school leader or tech lead, you simply don’t have time to get around to each classroom to show them features of a program. By creating a modified “train the trainer model” that involves students, you’re able to create a sustainable professional development model that teaches staff while empowering students along the way. And if you’re really lucky, you get a Gold Star from a student!


